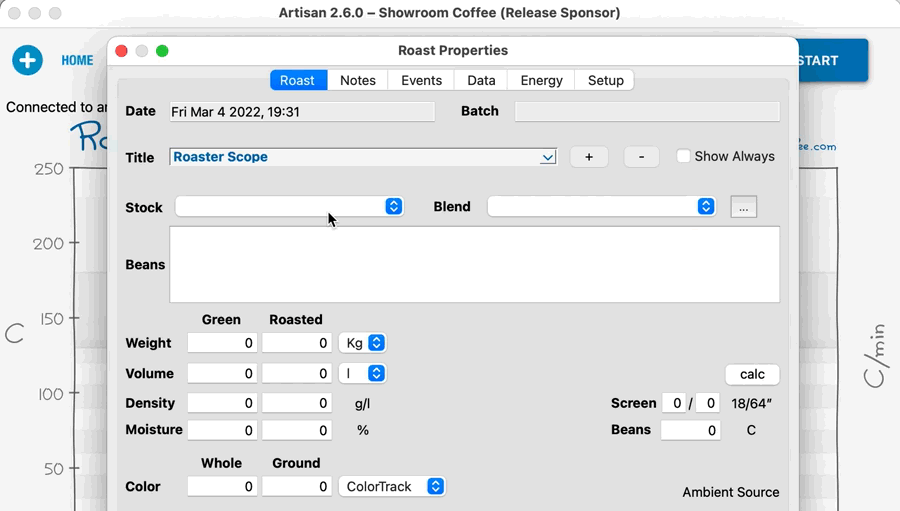
Roast Properties Dialog
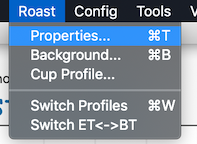
Menu: Roast » Properties
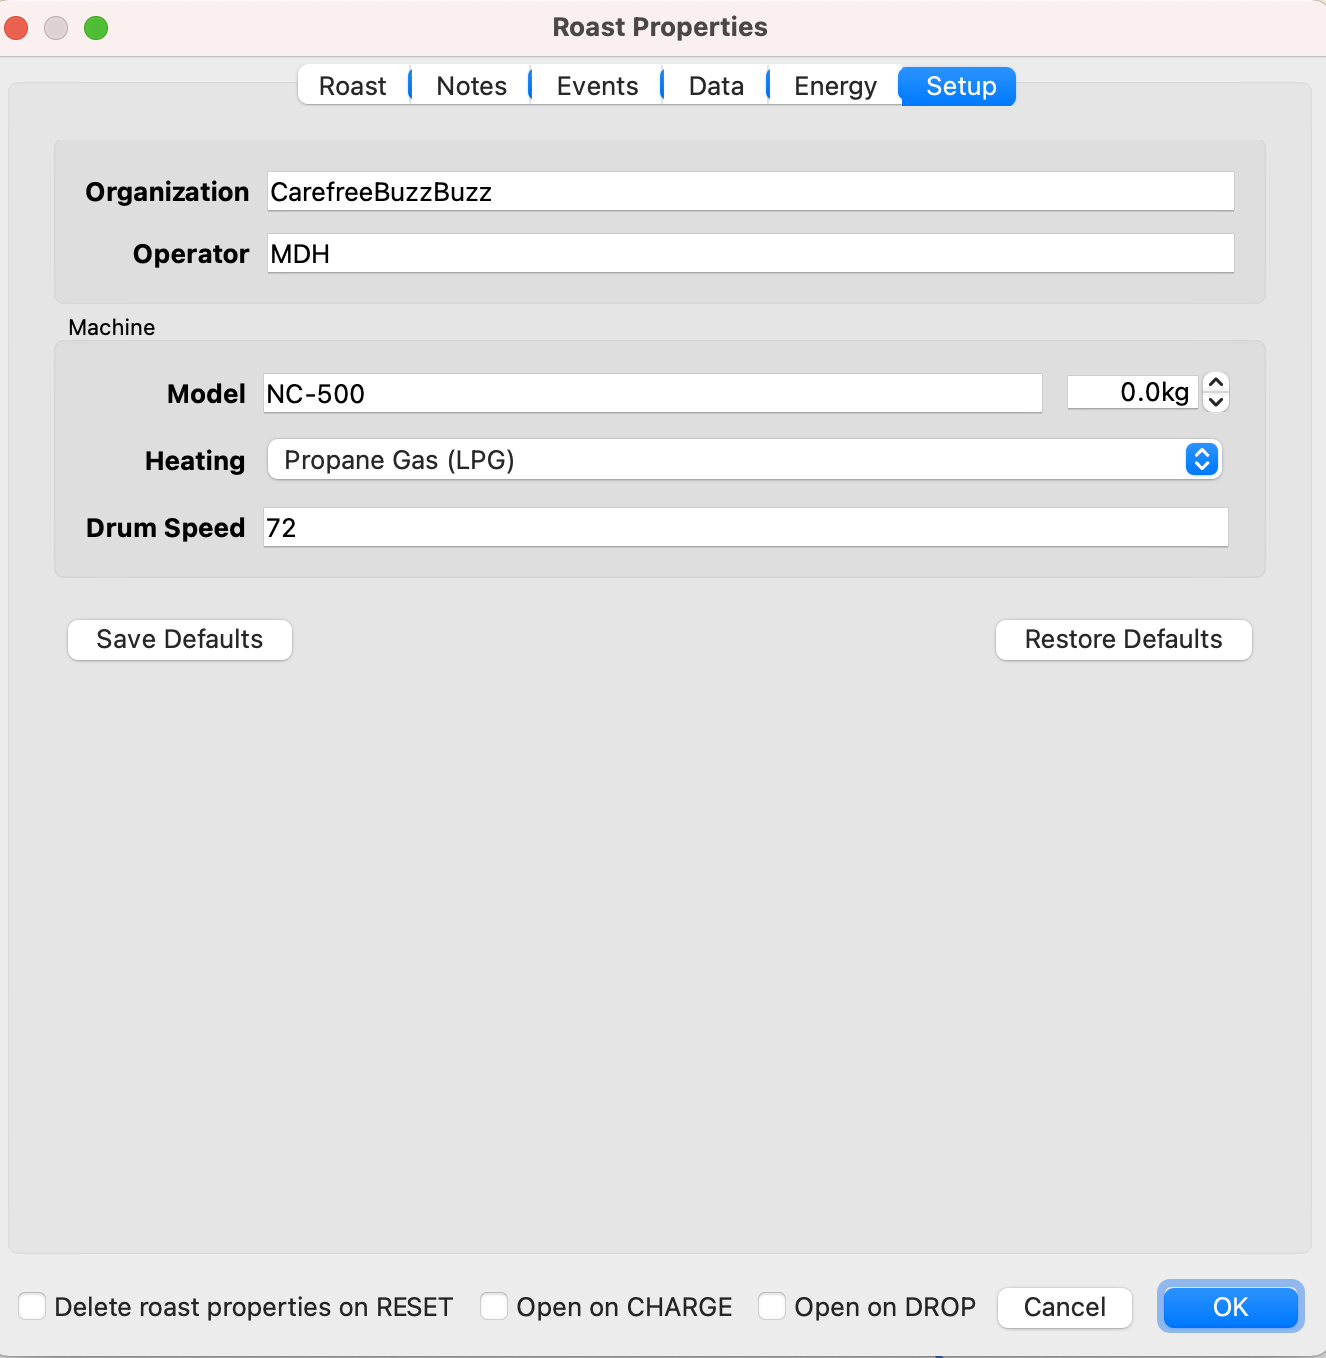
Under the Roast Properties, you can input many parameters for your current batch and you can choose a prior roast profile to run in the background. What you enter here may end up as part of the Summary dialog box which can be printed for your labels. There is a tab called Setup which contains basic information including the Organization Name, Operator Name, Machine Model and Size, Heating Method and Drum Speed. Fill this out first.
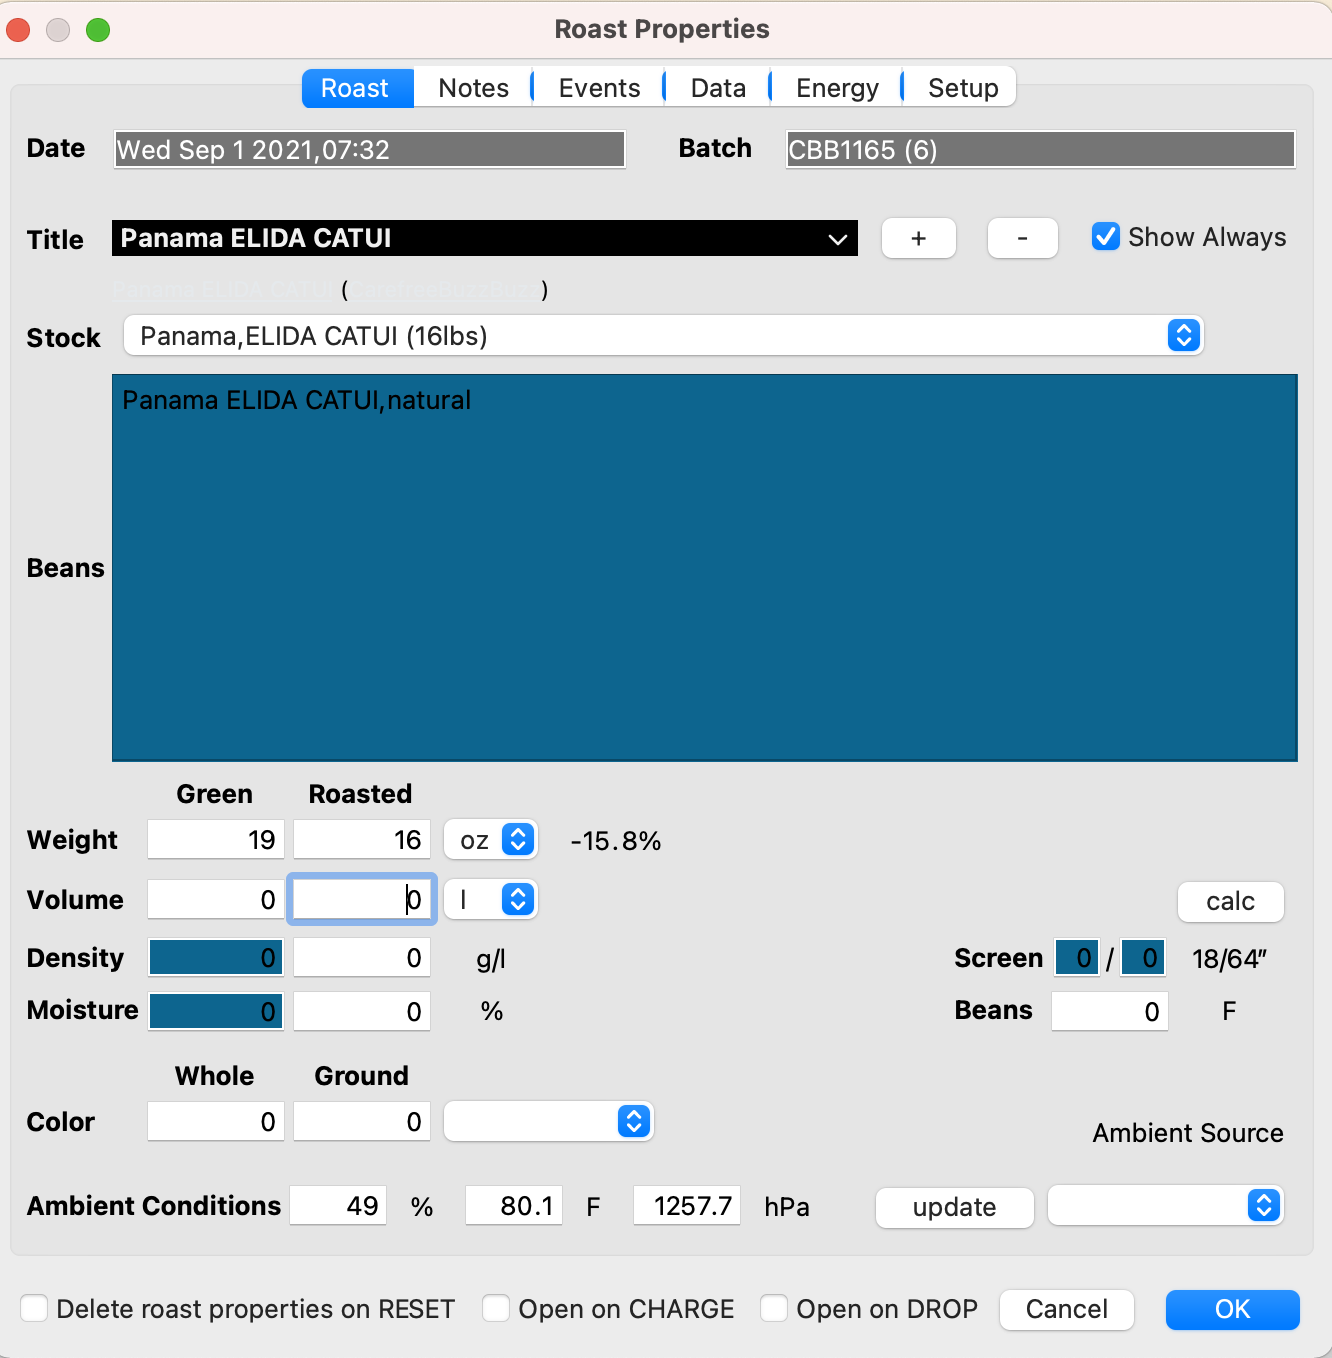
When you enter the coffee bean name under Title, it shows up on the graph. The idea is that “Title” is actual the product title, but some people use the title for other things. That product title gets combined with the batch number to be rendered as a title on the profile. The beans you use can be specified in the beans field. So for example you have a product called Holiday Roast and in the bean field you enter the three types of beans you used. The items Stock and Blend are for Artisan.Plus users tracking their inventory.
If you press +, your current roast profile gets saved (up to 25 entries). Here it is assumed, that you re-roast your “product” several times. Thus the product name together with the charge size is added to the Recent Roasts menu. That menu is available as dropdown in the Roast Properties dialog next to the + and also as menu item under Files » New. Hold down the Alt or Option key as well to save the output such as the roasted weight. If you select one of those Recent Roasts from the File » New menu, the saved Roast Properties are re-entered and profile placed in the background, and then the roast is started. This is a quick way to start a re-roast of a product. You can also select one of the Recent Roast items in the Roast Properties dropdown to have the saved roast properties entered and the associated profile placed in the background. Check the Show Always box if you want the Title to show while you are recording a roast. Read Recent Roast Properties for the details on using the + feature.
You can note moisture as well if you know it, and ambient data. If you want to manually enter ambient data, leave the source dropdown blank. If you have a VintHub Phidget, you can use Phidgets to record the ambient temperature, humdity and and pressure. See File » Config » Device, Ambient Tab. These will show up in the Summary box.
On pressing RESET the following values are cleared:
- title and beans
- store/coffee/blend (artisan.plus)
- green weight/volume/density/moisture
- screen size and bean temp
- ambient temp/humidity/pressure
On the second tab Notes, you can add roasting and cupping notes. The first two lines will show up in the Summary box. Events and Data are entered by Artisan throughout the roast. You can now use the Copy Table button on these tabs from a roast to export the data to Excel using the text import wizard.
To reset the Properties you have to select the box “Delete roast properties on RESET” and then reset. You can also have the Properties box open on charge to remind you, mostly to at least, to name your coffee.
Use your Acaia Lunar or Pearl Scales On macOS and Windows 10 a direct Bluetooth Low Energy connection to the Acaia Lunar and Pearl scales is supported. This connection is demonstrated in the post weight • volume • density.
Custom Blend Editor for artisan.plus users The blend editor allows you to quickly define an ad-hoc blend. This is useful for blends that you do not plan to reuse as this avoids having to define a blend on the artisan.plus platform beforehand. If you set the weight to 0 this editor allows you to enter the components by weight instead of ratio, calculating the total weight.
Density calculations
With weight and volume entered, density can be calculated.
Two blog posts on the density calculations here and here.
You need a beaker that is smaller than your batch size for this calculator. You will put in your unit of measurement at the top (say a 400ml beaker), and then you put in your pre and post roast weights to fill that measure of beans on the left. The calculator will return the density both pre and post roast using the actual pre and post grams. Once you know the density of the bean you are using there is shortcut. Assume you know the bean’s density you can enter the known density in the Density field within the roast properties, select the correct density weight (e.g. grams) and volume units (e.g. one liter – put 1 in the box). Put the cursor in the Volume field after putting in the weight and press the Enter key. Artisan will take the specified density and batch weight of the greens and compute the volume for you.
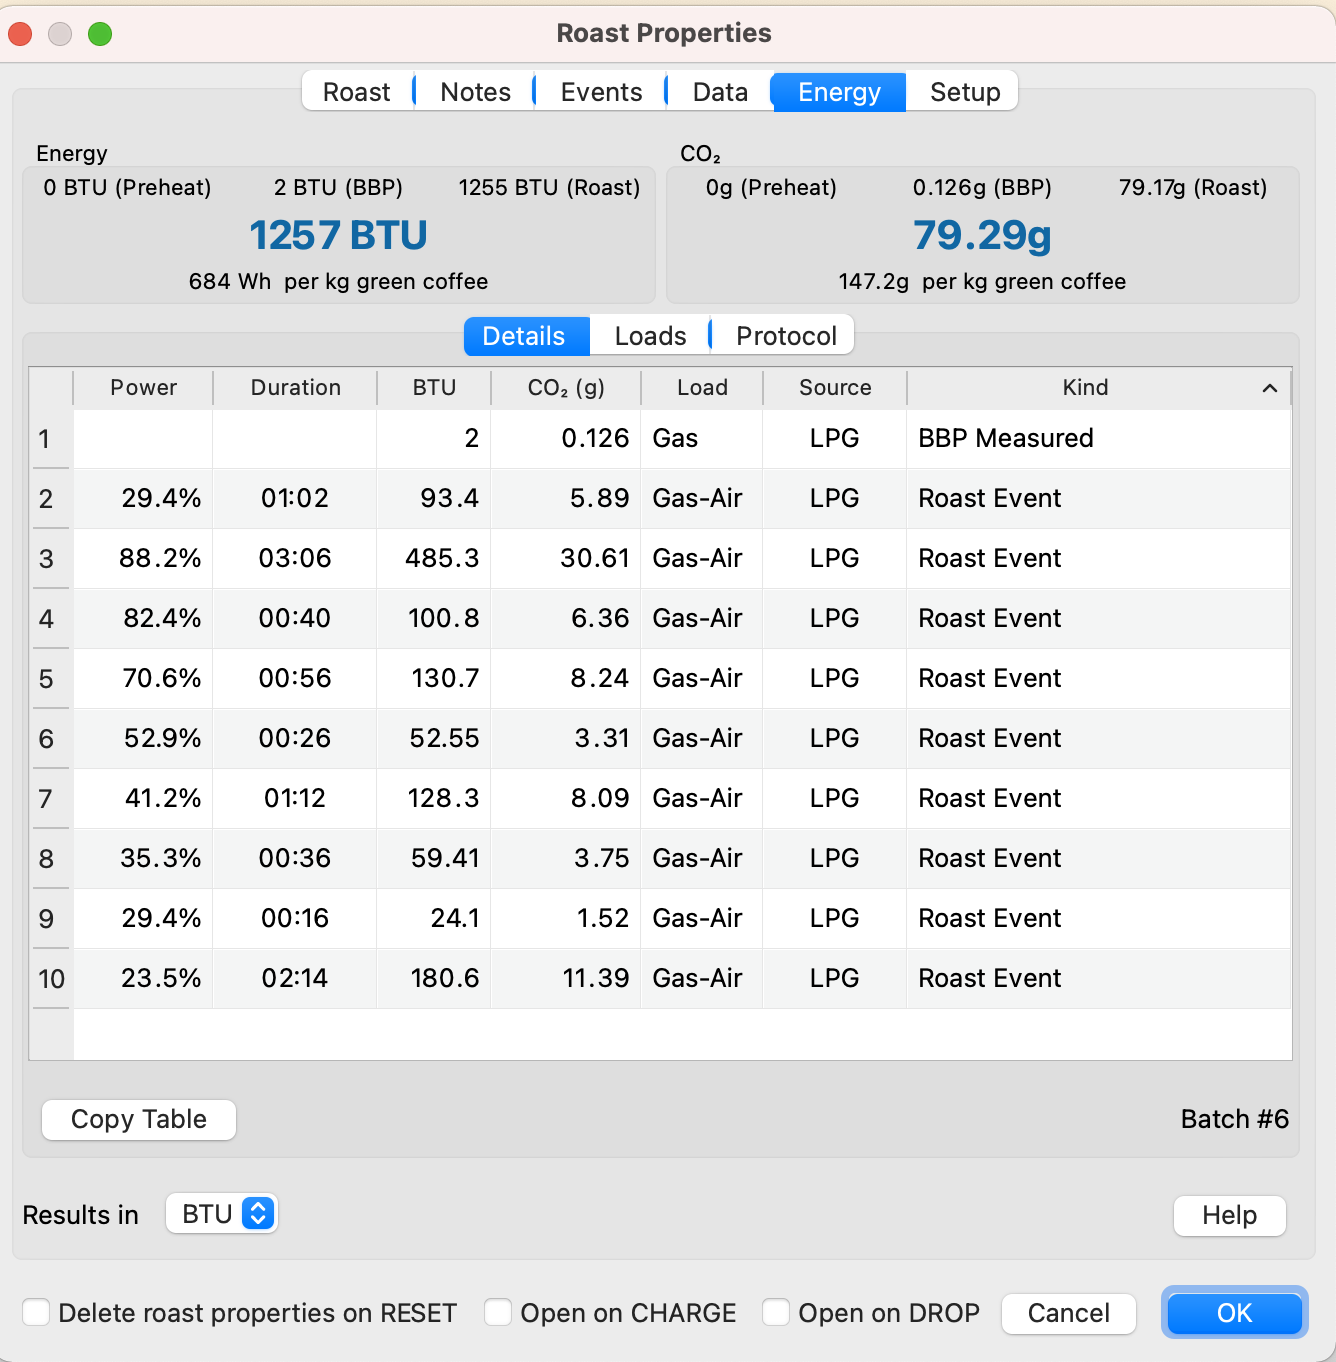
Energy Consumption For tracking energy consumption, those parameters are entered on the Energy tab. The analysis and entries are explained in the blog post Tracking Energy Consumption & CO2 Production in Coffee Roasting.