
Designer
Menu: Tools » Designer
Designer allows you to create a model roast profile. Read the following description and then watch a video on how to use it.
After you have entered Designer mode, to save a profile created in Designer mode, go to Tools » Designer and untick the Designer menu item, and you are left with a regular profile that you can save as any other one.
You can also import a profile into Designer from one of your roasts; however, Designer extrapolates the curve from recorded Events in the profile and it won’t look like your exact profile.
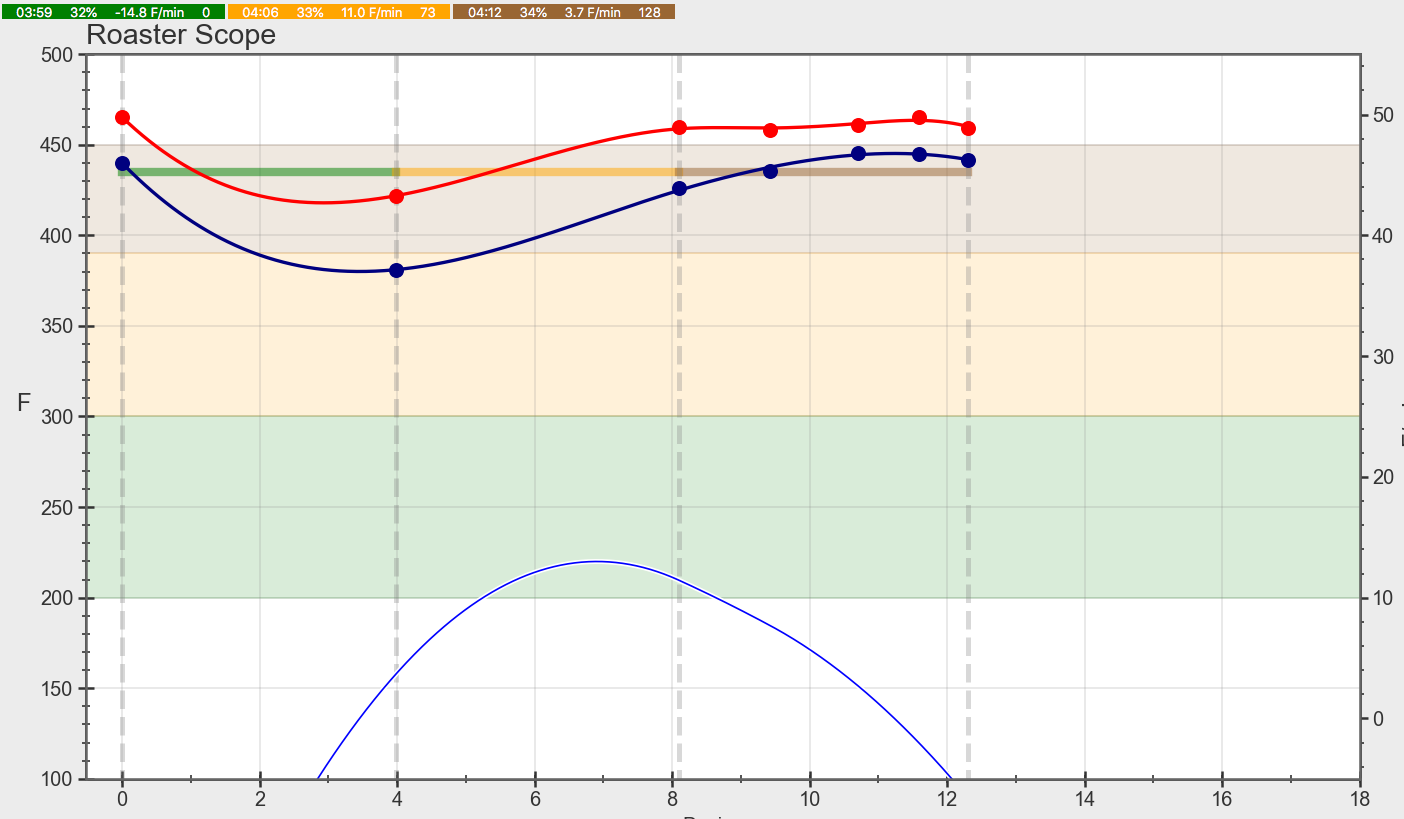
So, if the original curve is this:

And you import it into Artisan by selecting from the top menu, Tools » Designer. Designer warns you that you’ll get something different. Note on importing - The coffee title is imported into the Designer only when Roast » Properties, Delete roast properties on RESET is unchecked. Indeed there is a RESET operation when opening the Designer (with or without importing).
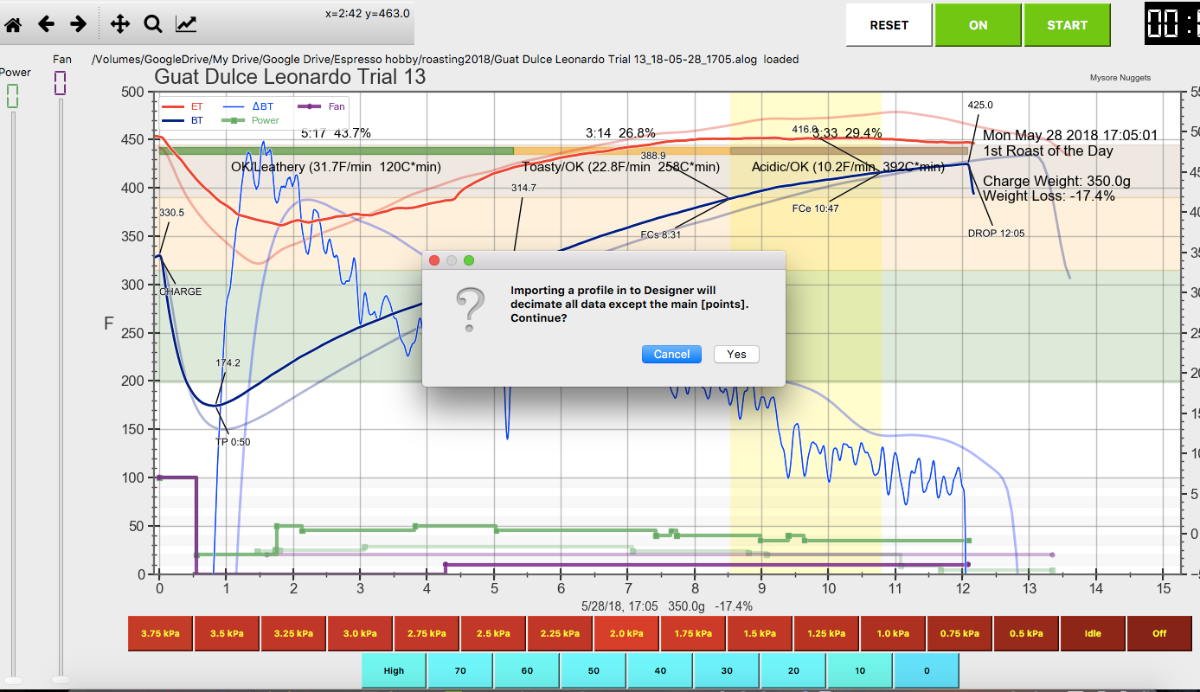
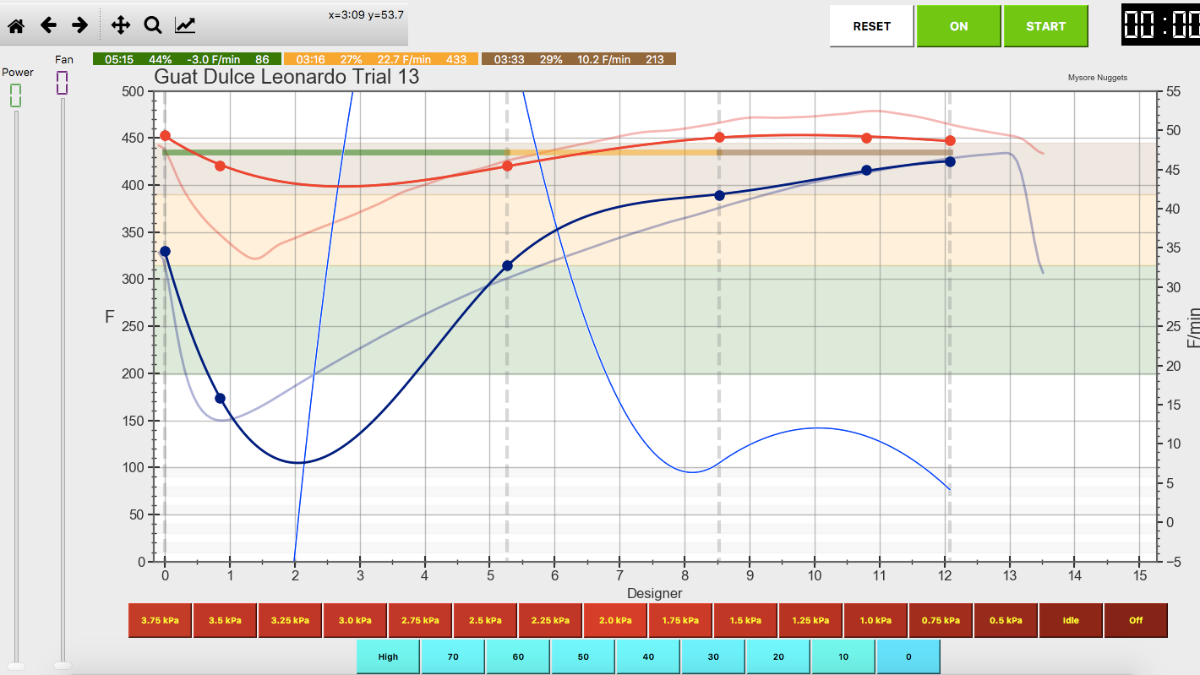
And the result is certainly different.
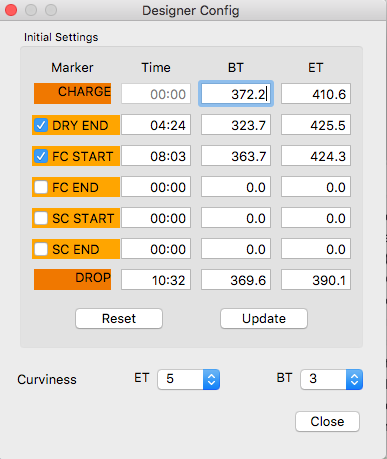
To design a useful curve to use as a background when you roast next, you’ll need to adjust the curve that connects them so it reflects the usual performance of your roaster. Right click to bring up Config, which will allow you to modify the key times like DE, FCs etc.
You can also see the Phases information at the top. If you hover over an event the Phases bar will show you the time for that event. Note if you see a negative number for ROR in the dry phase. The RoR before Dry End is calculated differently in Designer. Outside the designer it is measured from TP to DryEnd. In Designer it is measured from CHARGE to DE. That is why you may see a negative number since your CHARGE temp is higher than the DE temp. This may get changed in future versions.

Designing a curve is a sequential process: 1) Right click to choose Config to insert your main points; 2) Insert new event points between the events you imported into Designer; 2) Grab and drag those in-between points to adjust the curve that connects your imported events; 3) Move your key events (vertical lines with dashes) like DE or FCs too where you want them by sliding them left or right; 4) Fine tune the roast profile by further dragging points to where you want them. To get a declining ROR curve, make changes in the BT curve. Use a declining ROR curve as your guide to have Designer help you know where to locate targeted events.
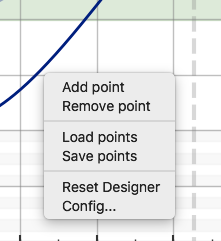
Right click example: hover the cursor over the curve and right click to add a point in between previously imported event points.

That pops up a window showing where you are adding the point.

The next screen shows the point added.

Left clicking over the point allows you to drag it upward, adjusting the BT curve and the ROR curve along with it. Grab icon is not shown.
The process of creating a realistic curve for your roaster will likely involve inserting “in-between” points after where turning point is marked and dragging those points upward until the curve actually rises after TP.

With further adjustment of the BT line the ROR line will come into shape.